Dry Erase Stop Motion Animation
के द्वारा योगदान एंडी गौकेले
![]()
![]()
Description
In this activity, students will create the illusion of a moving dot with stop-motion animation using a dry-erase board and markers.
दिशा-निर्देश
- Begin by making sure your dry-erase board is securely placed in a position where it will not move as you draw and erase.
- सुनिश्चित करें कि आपका कैमरा भी सुरक्षित है और फ़ोटो लेते समय हिलता नहीं है।
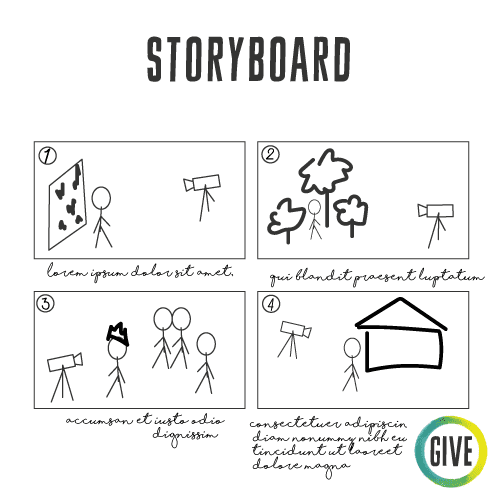
- Decide on a direction or path your dot will follow on the dry-erase board. Depending on how complex you’d like this to be, you can create a simple storyboard that shows a beginning, middle, and ending frame for your animation.
- Select a colored marker to use to draw a dot that will give the most contrast with the color of your dry-erase board.
- Draw a dot. Take a photo. Erase the dot. Following the direction you decided on, draw the dot just next to where it was before you erased it. Take a photo. Erase the dot. Draw the dot again just next to the last dot you erased.
- कम से कम 150 बार दोहराएं जब तक कि आपके पास व्हाइटबोर्ड के चारों ओर घूमने के लिए आपके डॉट की एक लघु फिल्म न हो।
- टिप्स:
- Draw your dot on a clear direct path so that it appears to be moving in a line or arc. If the animation program you’re using has onion skinning, use that to help guide the amount of change in each frame.

- This activity can be as simple or complex as you like. Students can increase the complexity by adding a second or third dot to their animation that has its own path (imagine a pinball machine with two or three balls in play at the same time). Or add a dash that acts as a paddle for the dot/ball, and you can re-create a game like Pong or Arkanoid.
- Draw your dot on a clear direct path so that it appears to be moving in a line or arc. If the animation program you’re using has onion skinning, use that to help guide the amount of change in each frame.

Transition Into Activity
Before you begin this activity, provide the class with an example film you have premade, or make one together.
Transition Out of Activity
Before moving on to the next activity, each group can share what they created with the whole class.
कक्षा व्यवस्था
Students can either work alone or in pairs at desks or tables. Having tables set up in a large space such as a library or cafeteria works best. This gives students room to set up cameras and devices and securely set up whiteboards.
समर्थन/अनुकूली सामग्री/उपकरण
- Share short, preprinted, and completed storyboards for students to animate. This could be framed as though you’ve been hired to animate this storyboard. The storyboard could also be partially complete, with a couple panels left blank for students to complete.
- ए timer/visual timer can be used to remind students to rotate roles (as applicable), save their animation, and play back their animation for continuity and quality of motion.
- Only provide high-contrast marker options.
- Provide pencil grips for students using pencils to work on their storyboard.
- If someone is using a wheelchair or other tool to support their motion, ensure there is enough space around the equipment and tape down anything that may be a trip hazard.
Possible Roles for Classroom Professionals
- Check in with students as they create their work.
- छात्रों के लिए फोटोग्राफर बनने की पेशकश करें ताकि वे अपने डॉट ड्रॉइंग पर ध्यान केंद्रित कर सकें।
Adjustments for Remote Instruction
Use a 2D animation program to mimic the dry-erase animation or share your screen with your dry-erase board up. Students can participate by giving you directions on the path of the dot’s movement. Students could also work on their own to create a film of their moving dots and then share their screen at the end of the activity.